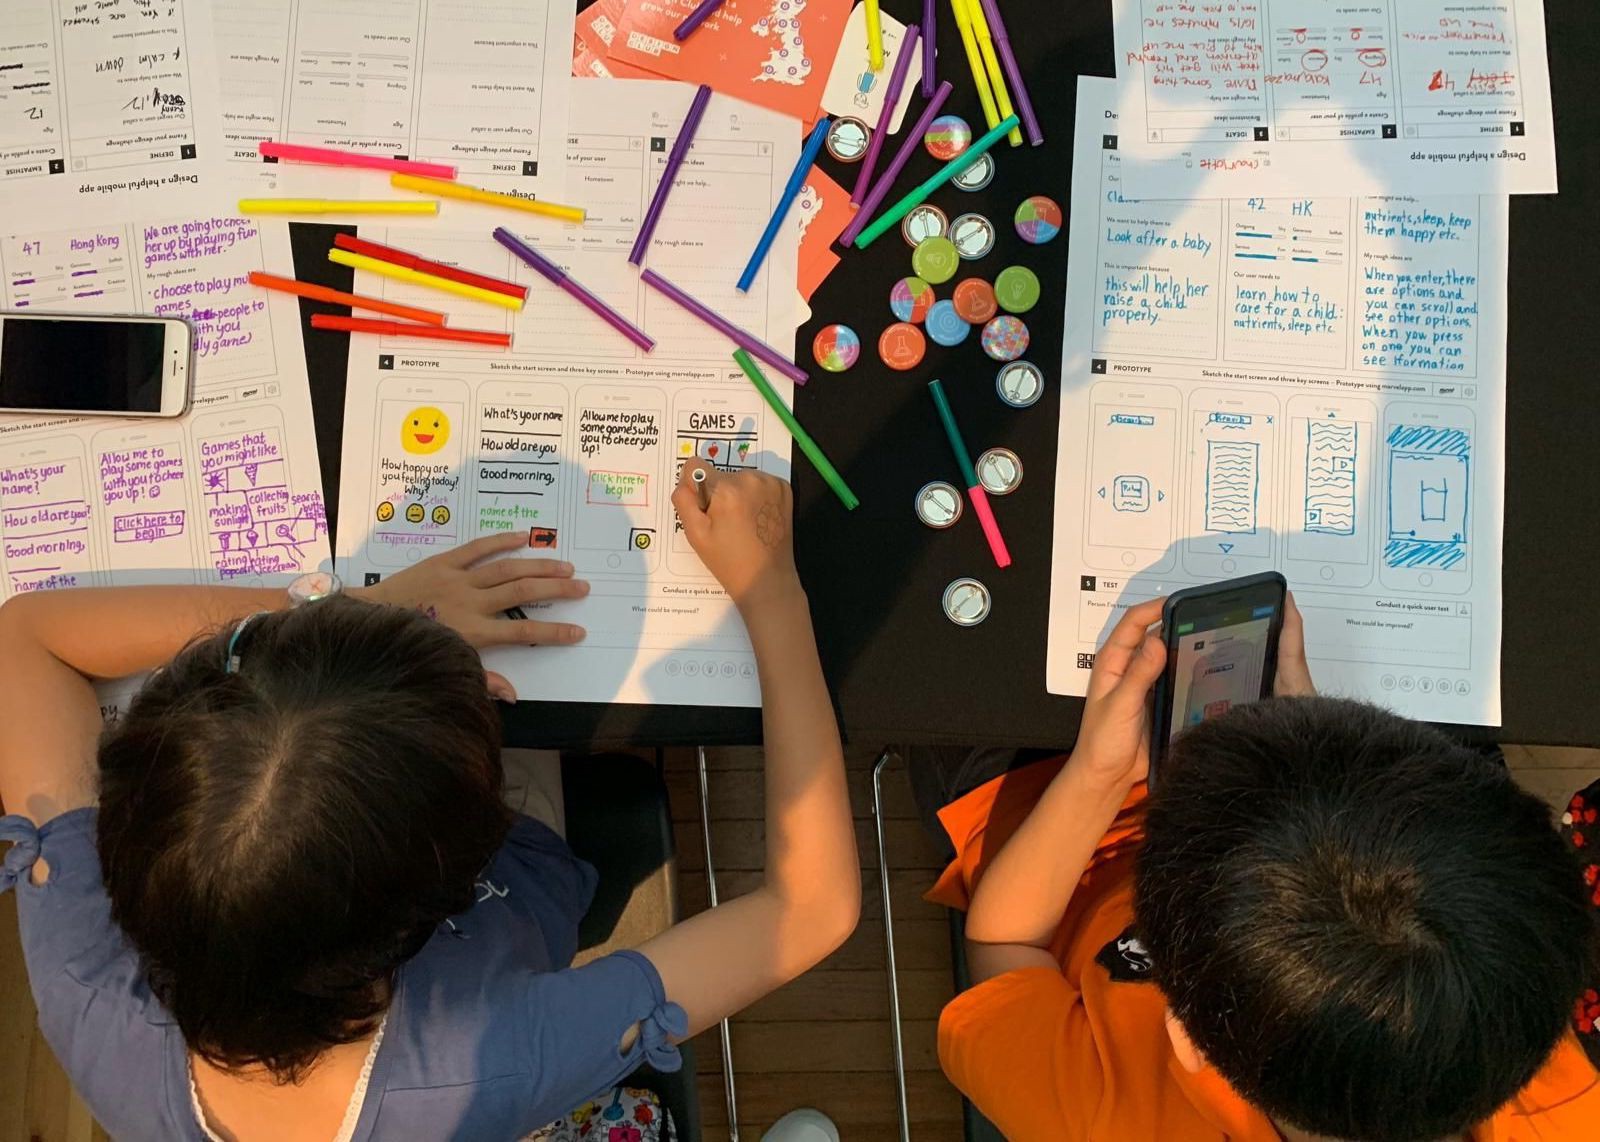
Did you know that hundreds of workshops take place around the world each month using Marvel? From schools to enterprises, Marvel is used across every age group. The growth we've seen across education has been amazing and initiatives like Design Club have been driving design and prototyping with kids across the UK who will no doubt be the entrepreneurs and makers of the future!
We’re halfway through our @innovateheruk journey! Students have been designing prototype apps using @marvelapp this afternoon.
???? pic.twitter.com/LYWHJD1jGd
— Whalley Range High (@wrhs1118) March 3, 2020
It's #TakeYourChildToWorkDay at Comcast HQ! We hosted a Mobile App Prototyping Workshop for over 100 kids and their parents. These future technologists used @marvelapp to string together drawings into a prototype app they could show off to their friends. #YourPlaceAtComcast pic.twitter.com/jq4zleaGfZ
— Comcast Careers (@comcastcareers) April 26, 2018
We're excited to publish this guest post from Jemima Gibbons, the co-founder of Design Club. This article takes you through how to run your own mini design-thinking session at home with your kids using Marvel. It's super engaging and you'll end up with interactive prototypes made using our iOS and Android apps.
Without further ado, here's Jemina to talk you through:
Sounds interesting. What is design thinking?
Design thinking is a process that originated in the design industry but is now used for problem-solving across many different sectors. We believe design thinking is a powerful life skill that every child can benefit from learning.
Design Club is a social enterprise that offers free tools and resources to help people deliver design thinking workshops to children. One of our most popular worksheets is the mini-project.
Anyone can help their child or children with this project — You don’t have to be a designer! You just need enthusiasm and a bit of patience :)
The mini-project works well for children aged 7–13.
It looks like this:
Okay. What do I need?
Make some printouts
- One A4 mini-project or A3 mini-project worksheet per child
- The People and Challenge worksheets (optional: cut into squares)
- Extra App Sketching Sheets to design more screens (optional)
Set up your space
- Set aside 2–3 hours
- Tell your child(ren) they’ll be doing something fun and creative
- Put on some relaxing music
- Clear a table, desk or floor space
- Lay out coloured pens, pencils, scissors and paper
Once each child has a worksheet in front of them, tell them they’re going to be working as designers, and they’re going to design and prototype their very own mobile phone app — in five steps.
. . .
What are the five steps?
1. Define a challenge
Encourage children to pick someone they want to design for. They can decide on a person from the people worksheet, choose a friend, neighbour or someone they know, or even a celebrity or well-known figure.
Ask them to pick a challenge from the challenge worksheet. Alternatively, you might want to have a chat and help them come up with their own challenge — something they think might help them or their community.
Ask them why they might need a different design for different people. Ask them what different users might find important.
 Designing an app to help someone recycle more (photos: Daniel Gost)
2. Empathise with your user
Talk to children about empathy and what it means. For this step, they need to try and put themselves in their user’s shoes. Ask them to imagine what their user likes and doesn’t like. Then ask them to write down what they think their user needs in relation to the challenge.
3. Ideate possibilities
This stage is all about coming up with ideas. Talk to children about any apps they like to use — or show them one of your favourite apps — and discuss what the key features are.
Ask them what features they think their app could have in order to specifically meet the needs of their user.
You could encourage writing or drawing ideas on scraps of paper or Post-its to start. Then copy the best ideas over to the worksheet.
 Once you’ve chosen which ideas to use, start prototyping by sketching screens (photos: Daniel Gost, Jeanette Sha)
4. Prototype your app
Ask children if they know what a prototype is (see below). Get them to imagine what their user’s ideal app might look like. Then ask them to draw the first few screens. Suggest they put a logo, tagline and start button on the first screen. And think about what their user might like to see next.
Children might want to create a “home” screen with three or four feature options. Then draw additional screens for each feature. (If you need more templates, print out additional Sketch your app worksheets).
Once children have sketched the screens, they can take photographs of each screen using Marvel, and add links between each screen to create a digital prototype. Alternatively, you can help children cut out each screen and put them into a cardboard model of a mobile phone.
What do you mean by prototype?
A prototype is the first version of something. It’s a basic version that shows people how an idea might work. Our projects don’t involve any coding. Children make prototypes with their own hand-drawn pictures.
To make a digital prototype, you’ll need to install Marvel on your mobile phone. A basic Marvel account is free. Marvel is easy to use. Have a play around before the session if you can.
Alternatively, if you want your session to be 100 per cent unplugged, you can use cardboard cut-outs and paper to simulate a mobile phone.
 Creating digital prototypes using Marvel (photos: Daniel Gost)
5. Test your app
Have a chat with children about why they think testing might be important. Explain that all good designers welcome feedback as it helps them to improve their designs and make them even better!
Offer to role play the user yourself, or ask children to role play users for each other. If children have designed for a person they know in real life, it would be brilliant if that person could come and test the app.
Children need to ask their user to run through the prototype and make notes about what they say: tell them to ask their user what they think the app is for, what they like about it and they think could be improved.
Finally, ask children what changes they might make to their design, following the feedback. Afterwards, you can go back to step 1, start a brand new project, or celebrate with a cup of tea and a slice of cake :)

 Children working on Design Club mini projects (photos: Daniel Gost)
. . .
Any final advice?
Show a genuine interest in the work being produced and offer lots of positive feedback. Try to ask questions rather than tell children what to do. Give them plenty of time and space to create and develop their own ideas.
We hope you’ve found this blog useful. Let us know if you’ve any questions. If you run a mini-project, let us know how you get on: you can share your sketches and prototypes with us on Instagram, Twitter or Facebook.
For more free design thinking resources, see Design Club’s Resource Hub.
Sign up to our newsletter for project ideas to do at home.
Peace & prototypes!
Design Club x


